Wednesday, 4 November 2015

Fruit Mince #Christmas #fruitmincetarts


Christmas is synonymous with fruit mince tarts which are very popular for this joyous celebration. Today, you can purchase this product easily, but most of them are too sweet and jam like. Why not try to cook these delightful little parcels at home.  Make them to your own taste and wants by using any type of fruit, add/reduce the  sweetness, spices, etc.... Good fruit mince filling can keep up to 2 -3 months. In preserving bottles, it can be kept for over a year without opening. 
Fruit mince filling can be used for a variety of uses, not only for making Christmas fruit mince tarts
, but used to bake cookies, slices ...or simply serve with vanilla ice cream.


Ingredients:


Part A:
 
1 kg Dried Mixed Fruit
1 kg Sultanas
1 kg Pitted Dried Dates
1/2  kg Dried Apricot
1/2  kg Dried Cranberries
250g Crystallised Ginger, chopped
Rind and juice from 2 oranges
3 tablespoons Lemon Juice
1/2 cup Honey
1 cup Brandy/ Whiskey*
1 cup Cointreau, orange liqueur*
1/2 cup sweet Sherry/ Port*
1/3 cup Mixed Ground  Spice
2 tablespoons Ground Ginger

Part B:

600g Red Apples
600g Green Apple
600g Pears
1/2 cup Brown Sugar
1.5-2 cups Apple/ Pear Juice, no sugar added
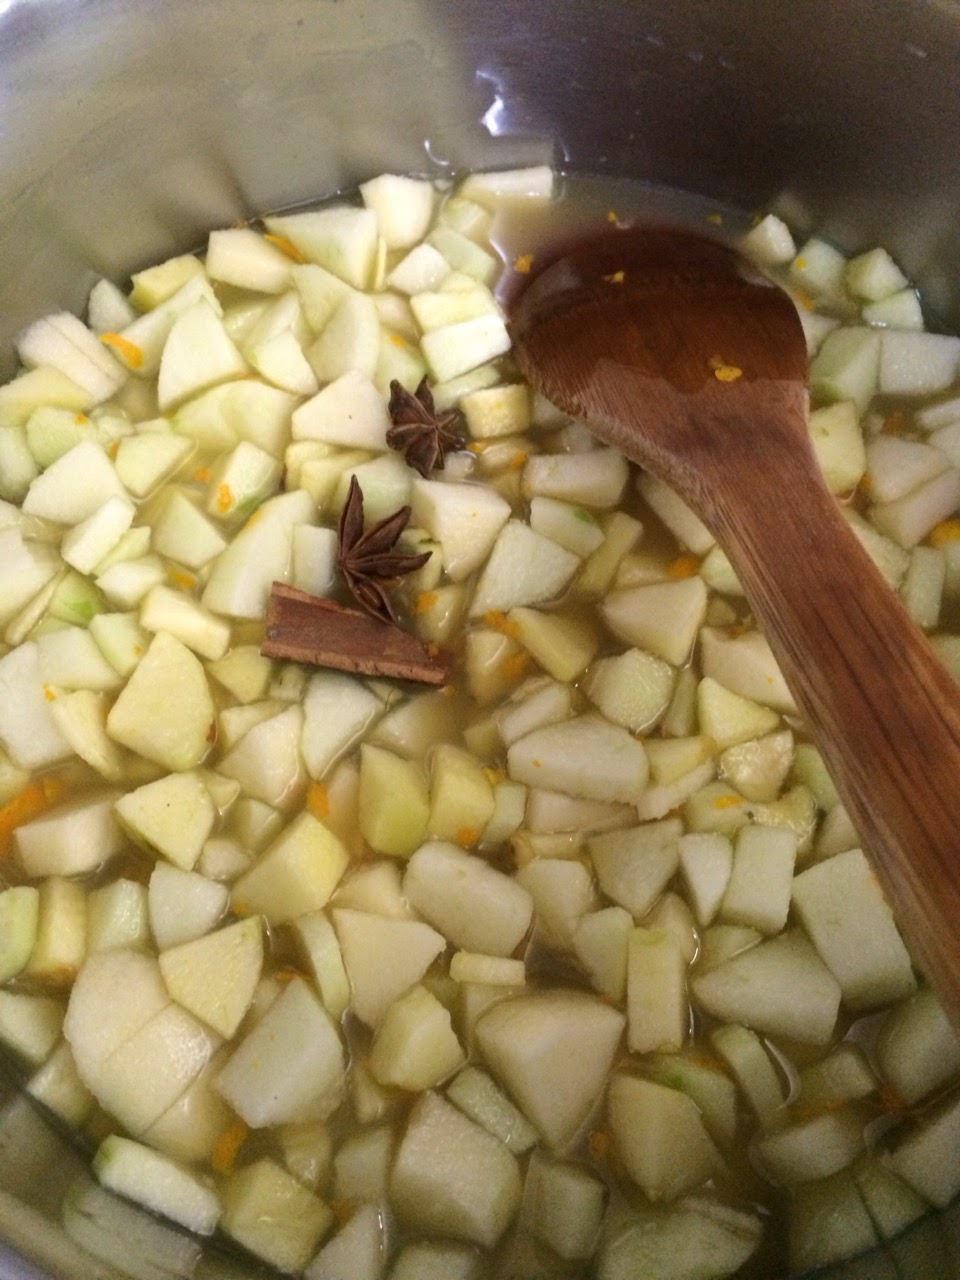
3cm Cinnamon Stick
2 Star Anise


Method:


Chop dates, apricots and mixed fruit in food processor. Do not process until fruit is too small as the cooking process will break the it down.  If you do not have a food processor, chop the fruit with a knife.
Place all the chopped, dried fruit and remaining Ingredients A in a large bowl/pot, mix well , cover with a clean towel for 24 hours.
Peel apples and pears, dice into small pieces.

Cook with other Ingredients B in a large boiler on high heat for 30 minutes until soft.

Remove cinnamon stick and anise star.
Pour all ingredients A  into B, cook for another 20-30 minutes on low- medium heat.

Stir well several times to avoid burning the mixture onto the bottom of the boiler.

Cool and then place  into clean bottles or plastic containers. For best results, make the fruit mince filling one week early. Refrigerate, and use as required.


Hints:


  • If you have preserving bottles, boil them for 10 minutes, dry with clean towel.

  • Fill with hot fruit mince, fill to 95% full immediately.

  • Screw lids on tightly and place  back into boiling water to cook for another 20-30 minutes (depending on the bottle size). The water must cover all the bottles when boiling them.

  • Cool at room temperature and keep in a cool dark spot. The fruit mince will keep up to one year. 
Please keep check for our fruit mince productions in coming weeks.
  • You can use any kind of wine/ liqueur. It not only adds a delightful flavour to the fruit mince, but also lengthens the storage time.

Tuesday, 13 October 2015

Crispy Almond Tuile Biscuits #nutty #foodporn

These Crispy Almond Tuile Biscuits are the perfect accompaniment for a cup of tea or coffee. Their light nutty texture makes it impossible to stop at one. This recipe makes a huge batch, buy if placed in an airtight container they will stay fresh and crispy for weeks. 


Ingredients:
 
180g Butter, melted and cooled
280g Caster Sugar
8 Egg Whites
200g Plain Flour
80g Ground Almond Meal
400-500g Flaked Almonds
1 teaspoon Vanilla Extract
1/2 teaspoon Salt


Method: 

In a clean bowl, beat egg whites on high spreed for 5 minutes. 
Add sugar, salt and vanilla, beat until peaks form.
Pour melt butter into egg white, mix well.
Sift flour, ground almond meal and almond flakes into the mixture.

Fold ingredients together gently with a spatula
Mix gently with spatula. 
Place into the fridge for 1-2 hours.
Preheat the oven to 150C
Place the baking paper on cookie trays.  

Spoon with 2 spoons onto baking sheets allowing room for the biscuits to spread.
Flatten out with spoon and with wet finges spread evenly.
Bake at 150C for 20 minutes or until golden brown. The longer the baking time the more crispy the biscuits. I baked about 25 minutes as I put 2 trays together.
Cool biscuits on a rack and place into the tin/container. Can keep up to 1 month.
Makes about 40 depending upon the size.


Tips:
Spread thinly on baking paper
 
  • To save time, pour the mixture into the trays, spread thinly with spatula, bake a little longer until golden brown. Break into bite size pieces after cooling down.
  • Immediately after removing from oven, roll the biscuits over the rolling pin or a bottle to make different shapes. These can be filled and decorated to serve as a dessert and serve with ice cream.

Contact: lee.leehocklai@gmail.com


Friday, 2 October 2015

Paella #Spanishcooking #rice

Paella is a traditional Spanish dish which is easy to make. Simply use any type of rice, seafood or meat in combination to prepare a delicious meal. I love seafood and I have used some local fresh seafood to cook this dish. The end result is a stunning combination of flavours, textures, and aromas.


Ingredients:


2 cups  Arborio rice
4.5 cups Fish/Chicken Stock
2 cloves Garlic, chopped finely
1 Onion, diced
2 large Tomato, diced
1/2 Red Capsicum, diced
2/3 cup Green Peas
1/2 kg large Prawns
1/2 kg Shrimp
1 cup Calamari Rings
1 cup Mussels, cleaned and beard off
2/3 cup Clams
1/2 cup White Wine
1 tablespoon Smoked Paprika
Pinch of Saffron Threads
1/4 cup Flat Leaf Parsley, chopped

1/3 cup Olive Oil
Salt and Pepper
1 lemon, cut into wedges


Method:

Heat the oven to 180C.
Add saffron threads to 1/2 cup of fish/chicken stock in microwave for 3 minutes.
Heat the paella pan with olive oil on medium-high heat.

Stir fry onion and garlic until little brown. Add tomato, capsicum cook for another 3-5 minutes.
Add the rice, paprika into the pan and cook for several minutes.

Add white wine and cook 2 minutes. 
Add all the stock and bring it to boil.
Add prawn, shrimp, calamari salt and pepper, stir well and cook for 15 minutes on medium heat. 

****You cannot stir the Paella anymore after this step.
When the stock has reduced sufficiently, place mussels, clams, peas on the top. 

Cover with aluminium foil and put into the oven for 10 minutes.

Add chopped parsley and lemon wedges to serve.

Serves 4-6 people


Tips:
  • Add some ground turmeric to make the rice rich and colourful
  • If you do not have a paella pan, use any normal pan that can be places into the oven, or simply pour into a baking dish for the last 10 minutes.   

Saturday, 26 September 2015

Lavender Cookies with Lemon Cream Cheese Icing

These beautifully light biscuits with a hint of lavender are perfect as both a sweet treat or as a savory morsel with a topping of minced chicken, beef, or cream cheese of your choice.


Biscuit Dough


Ingredients:

280g Butter, room temperature
3/4 cup Castor Sugar
1 Egg, lightly beaten
2.5 cups gluten-free Plain Flour
1 cup Corn Flour
2 tablespoons finely chopped Lavender Leaf and Flowers

1/2 teaspoon Salt

Method:


Preheat oven to 180C
Beat butter, salt and sugar until soft and smooth. 

Add egg and lavender.  
Combine in the flour.
Dust some flour onto the bench. 

Roll 1/3 mixture until 7mm thick. 
Use the cookie cutter cut the dough into small sizes. If you do not have the cookie cutters, roll the dough into small balls with your hand, then use folk to press flat.
Place in the oven and bake for about 16 minutes. 

Cool on the rack

Lemon Cheese Icing

Ingredients:


50g Butter
50g Cream Cheese
Lemon Zest of 1 Lemon
1 tablespoon Lemon Juice
2.5-3 cups Icing Sugar


Method:

Beat the butter and cream cheese together until smooth.
Add lemon juice and zest. 
Combine well with icing sugar.
Pipe the lemon cheese icing between 2 cookies. Continue till all the cookies are used up!
Place in airtight container and keep in a cooler place or fridge. 
Can keep up to 2 weeks.

Tip: 

Extra cooking time may be required if the cookies are larger in size. 
Brush with some egg water ( 1 egg yolk + 2 tablespoons cold water ) before baking. 
Add extra sugar and make plain lavender cookies without icing filling.
Bake extra plain cookies, keep in airtight container to make savoury snacks by adding cheeses, smoke salmon, roast vegetables etc....on the cookies,


Bon appetite!!

Contact: lee.leehocklai@gmail.com


Monday, 31 August 2015

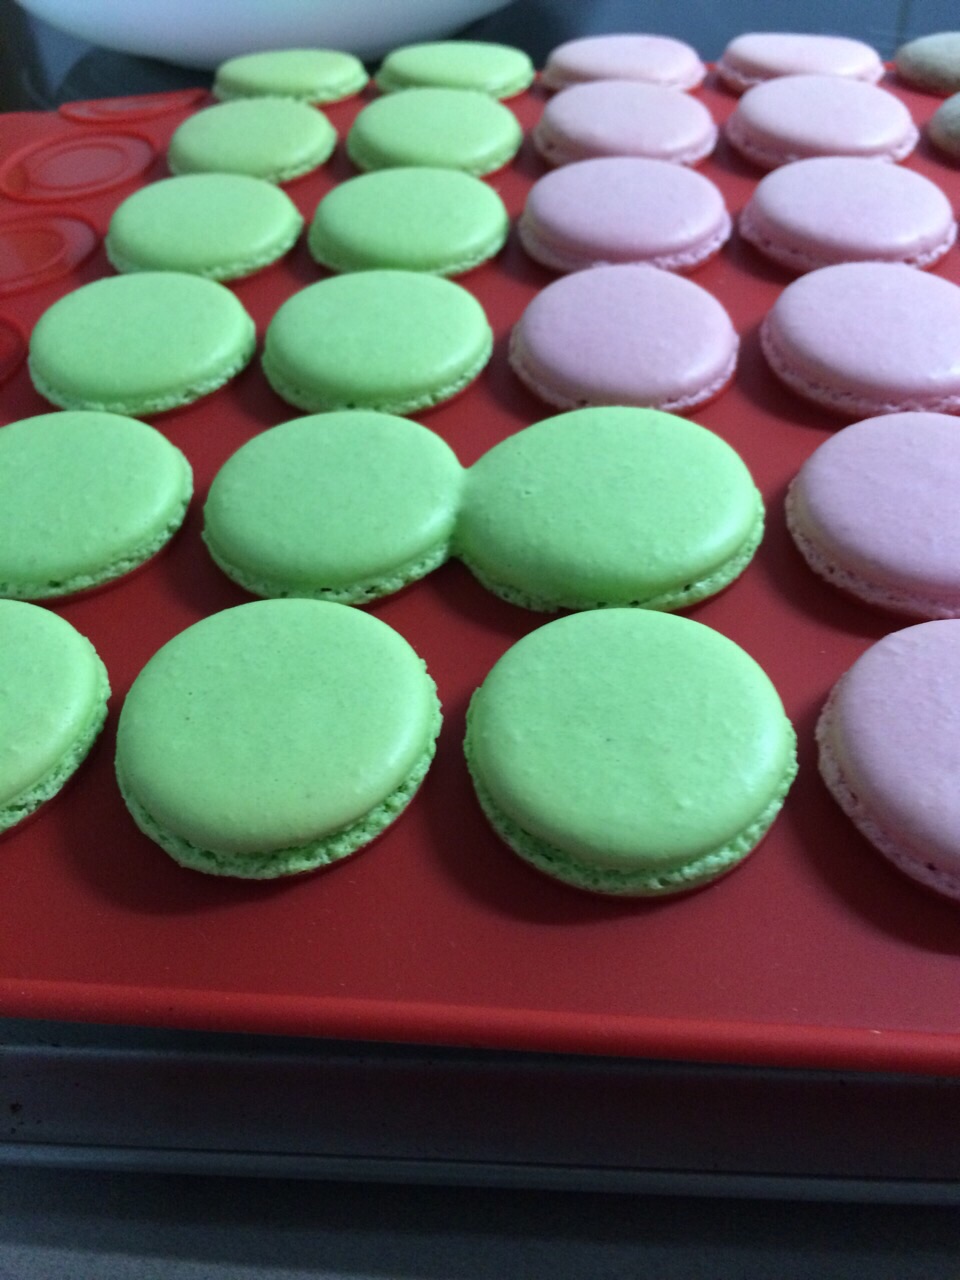
Macarons #frenchdelight #french #blissbombs

This is a basic macaron recipe. Add any flavour, or food colouring you like. However, for the best result, use the natural macaron flavours even though they may be a little more expensive. Today I have used use pandan (green), rose (pink) and chocolate for my macaron ...

 Macarons

Ingredients:
 
200g Icing Sugar
200g Ground Almond Flour
4 Egg Whites

150g Caster Sugar
2 tablespoons Iced Water


Colouring:


                 Drops pandan flavour
                1 teaspoon rose flavour + pink food colouring
                1 tablespoon cocoa powder + 1 tablespoon hot water


Method: 

Beat the egg white at high speed for 2 minutes. 
Add caster sugar and beat until firm and stiff peaks form.
Sift the icing sugar and ground almond flour into the mixture.

Add iced water and mix well.
Separate the mixture into three different bowls. 

Add colour/flavours and stir well until mixture is smooth and the colour is uniform.
Using a piping bag, pipe mixture onto trays lined with baking paper. 

Drop trays carefully to make the macarons firm. 
Rest for about 45-60 minutes until the outside of the macaron looks dry.
Preheat oven to 170C. 

Place the tray in the oven and bake for 5 minutes. 
Then turn to 110C and bake for another 15-20 minutes. 
Baking time may different for different ovens and dependent upon the macaron size - take one out to check, the prefect baked macaron must be dry and a little crispy inside.
Take out from the oven and cool.

Pipe in the cream/ganache. 
Place into the jar/container. These will keep in the fridge for
about 3 weeks.


Butter Cream

Ingredients:

250g Butter
1.5 cups Icing Sugar
50g White Sugar
1/3 cup Water
1 teaspoon Vanilla Extract


Method:

Heat caster sugar and water on medium heat for about 8 minutes to form a syrup. Place to one side and allow to cool.
Beat butter and vanilla extract on high speed until smooth and firm. 

Add the sugar syrup and beat for another 10 minutes. 
Sift in icing sugar and mix until smooth. 
It takes about 25 minutes to make this butter cream. It can be made one day ahead. Keep in the fridge to make sure it is not too soft and runny.

Chocolate Ganache

Ingredients:

200g Dark Cooking Chocolate, chopped
1/2 cup Thickened Cream
15g Butter


Method:

Place chocolate and butter in a bowl and heat over a saucepan of boiling water until melted. 
Pour cream into the chocolate mixture and stir until smooth. 
Cool in the fridge for about 10 minutes before use. 

Tips:

Use ground hazelnut or pistachio for a  different flavour.
Use peanut butter, jam or nutella in the filling.


Email: lee.leehocklai@gmail.com


Saturday, 27 June 2015

Chocolate Banoffee Tart #glutenfree #unitedkingdom #dessert

Chocolate Banoffee Tart originates from the United Kingdom. This is my simplified version that is an explosion of banana and chocolate with a hint of ginger from the crumbled Ginger Nut base. Served with ice-cream or whipped cream it is a lovely dessert or decadent treat for afternoon tea with a cup of coffee. If you are not gluten-free do not be put off, simply substitute normal Ginger Nut biscuits into the base and enjoy!

Ingredients:

1 packet Ginger Nuts, gluten-free
100g Butter, melted
3 tins Condensed Milk
1/3 cup Sugar
2 tablespoons Cocoa Powder
3-4 Bananas
Coconut
Strawberries to decorate

Method:

Place Ginger Nut biscuits in food processor and crumb.
Place into bowl, add melted butter and mix through.
Press into greased spring form tin.
Refrigerate till set.
empty condensed milk into saucepan.
Add sugar and cocoa powder.
Stir over low/medium heat until thickened.
Place half mixture into the spring form tin.
Slice the bananas and arrange on the surface of the mixture.
Pour remaining mixture over the banana.
Sprinkle with coconut and refrigerate.
Turn out of spring form tin and serve with whipped cream or ice-cream as you prefer.
Bon Appetit!

Chocolate Banoffee Tart
 Email: lee.leehocklai@gmail.com


Monday, 15 June 2015

Spaghetti Carbonara #glutenfree #italiancooking #pasta

This tasty traditional pasta is easy to cook at home. Whip up a fantastic dinner with only a few ingredients that will be ready in half hour. Why not spoil your family with this delicious, creamy pasta dish. 


Ingredients:

250g gluten-free Spaghetti (Barilla)
3 pieces Bacon/Pancetta, cut into thin slices
2 Egg Yolks
1 Egg
1/4  cup White Wine
1/2 cup Thickened Cream
1/3 cup Grated Parmesan
1 teaspoon Flat Parsley (chopped)
2 tablespoons Spring Onion (sliced)
1 teaspoon Garlic (crushed)

1/4 cup Thickened Cream, extra
Salt and Pepper


Method:

Bring water to the boil in a large saucepan, add 1-2 tablespoon salt. 
Add spaghetti, cook for for 7 minutes* 
Drain and add a little olive oil to the pasta.
Heat butter and garlic in pan. 

Saute the bacon for a few minutes. 
Add white wine, cook for 1 minute.
Add cream, Parmesan cheese, salt and ground pepper and pasta, mix well.
Beat whole egg and egg yolks in a bowl with extra thickened cream.
Pour the egg mixture, parsley and spring onion into the pasta. 

Turn off the heat and mix well working quickly.
Plate up, add ground pepper and shaved Parmesan. 

Serves 2-3 people. 

Bon Appetite!!

*If you do not like your pasta 'Al dente' you can cook a little longer. Wash cooked pasta with cold water if not using immediately.


Email:lee.leehocklai@gmail.com