Showing posts with label Pastries. Show all posts

Monday, 16 November 2015

Fruit MInce Tarts #christmas #traditions

With Christmas only weeks away, it is time to begin our  preparation of the traditional Christmas fare. In my last blog post I gave you the recipe for the fruit mince, and now we will make the beautiful tarts that everyone knows and loves.


Ingredients:

1kg Fruit Mince Filling, cold- check the recipe from our foods blog
350g Butter - diced into cubes and chilled
400g Plain Flour
120g Self Raising Flour
80g Ground Almond Meal (If allergic to nuts, you can replace with plain flour)
90g icing sugar
1 Egg Yolk + 1 Whole Egg
1/3 cup Iced Water
1/2 teaspoon Salt
Extra flour and icing sugar for rolling and dusting


Method:
 
Blend all flours, ground almond meal, salt, icing sugar in the food processor or rub through your fingers until mixtures resembles breadcrumbs.
Add both eggs and iced water, combine well till the mixture starts to come together.

Knead dough and wrap in plastic film. 
Refrigerate for about 1 hour.
Preheat oven to 180C.
Spray a 6/12 hole muffin tin, mini foil baking pans, or any large pie tins you like to use with oil.
Roll out a portion of the pastry till 2mm thick between two sheets of baking paper with some flour. 

Cut out shapes to fit the tins you choose. (I use a mini muffin pan but slightly deeper than normal) 
Fill each tart shell with 1-2 teaspoons of mince but do not overfill.
Cover the top of each tart with another circle of pastry or use cookie cutters to cut different shapes to decorate the top. If you cover tart completely with  pastry, pierce the pastry with a fork to let the steam out.
Bake for 18-20 minutes until golden brown. Extra time may be needed depending upon the size of the tin.

Cool for 5 minutes in the tin then remove and place on rack to cool.
Dust with icing sugar and keep into a plastic container. (Can keep up to 2 weeks or refrigerate for 1month.)
Makes 30 mini tarts depending on the baking trays/tins used.


Contact: lee.leehocklai@gmail.com

Wednesday, 4 November 2015

Fruit Mince #Christmas #fruitmincetarts


Christmas is synonymous with fruit mince tarts which are very popular for this joyous celebration. Today, you can purchase this product easily, but most of them are too sweet and jam like. Why not try to cook these delightful little parcels at home.  Make them to your own taste and wants by using any type of fruit, add/reduce the  sweetness, spices, etc.... Good fruit mince filling can keep up to 2 -3 months. In preserving bottles, it can be kept for over a year without opening. 
Fruit mince filling can be used for a variety of uses, not only for making Christmas fruit mince tarts
, but used to bake cookies, slices ...or simply serve with vanilla ice cream.


Ingredients:


Part A:
 
1 kg Dried Mixed Fruit
1 kg Sultanas
1 kg Pitted Dried Dates
1/2  kg Dried Apricot
1/2  kg Dried Cranberries
250g Crystallised Ginger, chopped
Rind and juice from 2 oranges
3 tablespoons Lemon Juice
1/2 cup Honey
1 cup Brandy/ Whiskey*
1 cup Cointreau, orange liqueur*
1/2 cup sweet Sherry/ Port*
1/3 cup Mixed Ground  Spice
2 tablespoons Ground Ginger

Part B:

600g Red Apples
600g Green Apple
600g Pears
1/2 cup Brown Sugar
1.5-2 cups Apple/ Pear Juice, no sugar added
3cm Cinnamon Stick
2 Star Anise


Method:


Chop dates, apricots and mixed fruit in food processor. Do not process until fruit is too small as the cooking process will break the it down.  If you do not have a food processor, chop the fruit with a knife.
Place all the chopped, dried fruit and remaining Ingredients A in a large bowl/pot, mix well , cover with a clean towel for 24 hours.
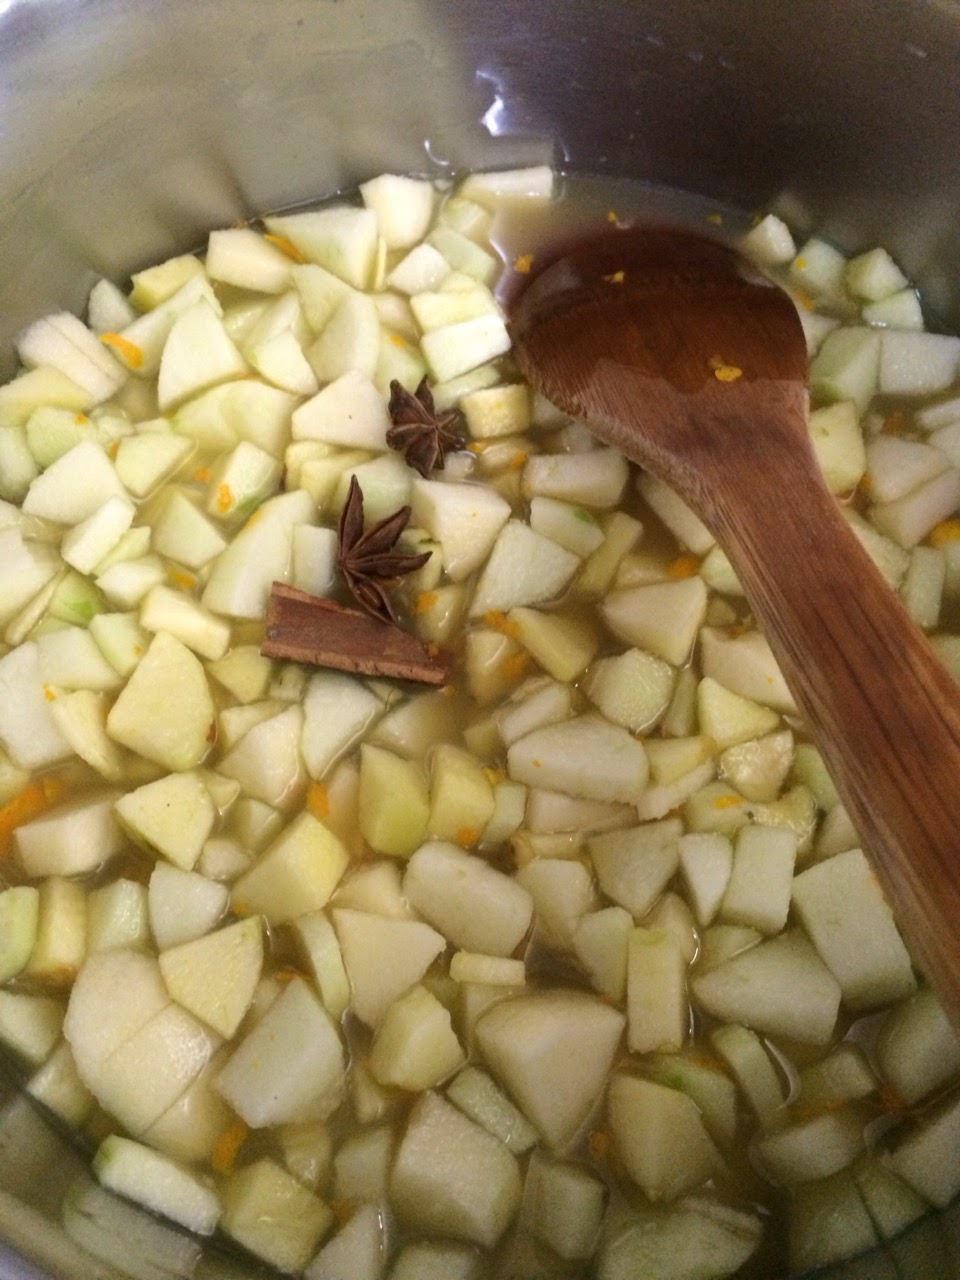
Peel apples and pears, dice into small pieces.

Cook with other Ingredients B in a large boiler on high heat for 30 minutes until soft.

Remove cinnamon stick and anise star.
Pour all ingredients A  into B, cook for another 20-30 minutes on low- medium heat.

Stir well several times to avoid burning the mixture onto the bottom of the boiler.

Cool and then place  into clean bottles or plastic containers. For best results, make the fruit mince filling one week early. Refrigerate, and use as required.


Hints:


  • If you have preserving bottles, boil them for 10 minutes, dry with clean towel.

  • Fill with hot fruit mince, fill to 95% full immediately.

  • Screw lids on tightly and place  back into boiling water to cook for another 20-30 minutes (depending on the bottle size). The water must cover all the bottles when boiling them.

  • Cool at room temperature and keep in a cool dark spot. The fruit mince will keep up to one year. 
Please keep check for our fruit mince productions in coming weeks.
  • You can use any kind of wine/ liqueur. It not only adds a delightful flavour to the fruit mince, but also lengthens the storage time.

Thursday, 25 September 2014

Almond Banana Tart #glutenfree #glutenfreerecipe #glutenfreepastry

This stunning tart is the perfect combination of  nuttiness and fruit. It is not too sweet, and when served with thickened cream or ice cream, it makes a fantastic dessert. I love it cold from the fridge for a quick snack when I have that craving for something extra mid-afternoon.


Pastry

Ingredients:

180g Butter
2.5 cups gluten-free Plain Flour
1 Egg, lightly beaten
1/4 cup Iced Water
1 teaspoon Sugar
Pinch of Salt


Method:

Oil spray a 24cm round loose base flan tin.
Rub butter, flour, salt and sugar in a bowl with your fingers until resembles breadcrumbs.

Add egg and iced water. 
Mix well with a knife or spatula until it forms into a ball.
Knead until smooth and does not stick to your hand. 
Add  more flour or iced water as necessary.
Roll the pastry between 2 sheets of baking paper until large enough to fill the flan tin. 

Remove the top paper and lift up the pastry with the bottom paper.
Carefully ease the pastry over the base and side, press gently against the surface of the tin. 
Prick the base with a fork then refrigerate for about 20 minutes.
Turn the oven to 180C. 

Bake the pastry for 12 minutes. (You don't need to cover the pastry base with baking paper and beans)

Almond Filling

Ingredients:

125g Butter
3 Eggs
1/3 cup Caster Sugar (Use 1/2 cup if you are a sweet lover )
1 and 1/3 cups Ground Almond Meal
2 tablespoons gluten-free Self Raising Flour


Method:

Beat the butter and sugar in a bowl until soft and smooth.
Add eggs one by one. 
Combine with flour and ground almond meal.
Pour into the pastry shell.

Topping

Ingredients:

3-5 Bananas
2 tablespoons Lime Jam (or any jam you prefer)
1 tablespoon Warm Water
2 drops Lemon Juice


Method:

Peel bananas and cut into slices, but not too thinly. 
Decorate and cover the almond filling.
Mix the jam, lemon juice and warm water together, then brush onto the banana slices.
Bake in 170C about 45 minutes or until touch firm in the middle. 

Take out the tart from the oven, brush  with leftover jam water.
Great to serve warm with thickened cream or vanilla ice cream.

 
Tips:
  • Usually I use same pastry recipe to make sweet tarts and savouries. So why not make double, half for the main dish and half for dessert. 
  • Substitute sliced pear, apple or any other fruit in the topping.. 

Contact: lee.leehocklai@gmail.com 


Monday, 11 August 2014

Banana Chocolate Chip Walnut Cake #glutenfree #bananacake


Father's day will coming soon. You can make this classic, simple cake and decorate yourself. Show your Dad how much you love him and what it means to have him in your life. Or, simply make for morning/afternoon tea to share with friends and family. Enjoy!!


 Ingredients:

250g Butter - room temperature
1 cup Brown Sugar (If you do not wish to top with cream cheese icing use 1.5 cups of sugar for a slightly sweeter cake.)
5 Eggs - separated
3.5 cups gluten-free Self Raising Flour


3 large ripe Bananas - mashed
1/3 cup Evaporated Milk
1/2 teaspoon Baking Powder
1/2 teaspoon Baking Soda
1/2 teaspoon Salt
2/3 cup Walnuts - roasted and chopped
2/3 cup Dark/Milk Chocolate Chips


 Method:

Preheat oven to 180C
Grease a large cake tin and line with baking paper. Or you can use 2 regular loaf tins too.
Beat butter, salt and sugar until soft and smooth. 

Add egg yolks one by one. 
Add mashed bananas and baking soda, combine well.
In another clean bowl, beat egg whites until firm peaks foam. 

Sift baking powder and half the flour into the banana mixture. 
Add half  beaten egg white and evaporated milk, fold through gently until combined well.

Now is the last step, this is very important to ensure your gluten free cake is as soft and high as a cake made with conventional flour:-

Add remaining half of the flour, chocolate chips and walnuts. 

Fold through gently using a plastic spatula. 
Add remaining egg white, fold through.
Pour into the tin and bake in 180C for 20 minutes. 

Bake at 170C for 30 minutes or until a skewer comes out clean from the middle.
Remove from the oven, let rest in the tin for 10 minutes.
Turn out and cool on rack.
Decorate with cream cheese icing or, sprinkle with icing sugar and serve with thickened cream or ice cream.


Topping:

30g Butter
80g Cream Cheese
1 tablespoon Lemon Juice
2 tablespoons Milk
2- 2.5 cups Icing Sugar


Method:

Beat butter, cream cheese, lemon juice and milk until soft and smooth. 
Add icing sugar, stir till combined.

Contact: lee.leehocklai@gmail.com


Friday, 1 August 2014

Chocolate Tarts #glutenfree #glutenfreerecipe #pastry #chocolate


This is an easy classic sweet dish. I used the leftover pastry dough from the Bacon Ricotta Pie to make the pastry bases 2 days ahead. This meant I only spent 10 minutes preparing the filling 1-2 hours before serving. If you not have leftover pastry dough,  make a batch from the previous recipe - Remember, try to make extra pastry shells to keep in the freezer or airtight container so you have some on hand to whip up a quick dessert or snack. I am pleased to share my recipes and experiences with you, please keep check our blog, more to come...


Pastry Dough

Please check our Bacon Ricotta Pie blog for the pastry recipe. You can use any size pie plate or baking tins you wish. As this dessert filling does not require baking in the oven, the pie shells need to be completely cooked before filling. 
The cooking times are as follows - small: bake in 180C for 15 minutes. 
Large: cover the base with baking paper, fill with rice or baking beads, bake 10 minutes in 180C.
Remove the paper, rice or beads, bake another 10-15 minutes or light brown in the center. 


Filling

Ingredients:

180g gluten-free Dark/Milk Cooking Chocolate
2/3 cup Thickened Cream
20g Butter


Method:

Bring water to the boil in a saucepan. Do not overfill as this is to be used as a double boiler to make the chocolate filling.
Place chocolate and butter into a bowl.

Place the bowl into the saucepan 2 minutes - the water level should be sufficient to come halfway up the outside of the bowl. 
Stir until chocolate and butter have melted.
Pour in thickened cream and stir until smooth. 

Do not let the chocolate boil, heat only until it has melted and mixed to a smooth consistency with the other ingredients.
Pour the chocolate filling into the tart base, let it cool and set at the room temperature for 1-2 hours. If you are in a hurry, set them in the fridge.
Sprinkle with icing sugar and decorate with thickened cream and fresh berries.


Tips:
  • Buy a good brand chocolate, it may little more expensive but will give you a better result and a full rich chocolate flavour.

Contact: lee.leehocklai@gmail.com 


**** Our next recipes will be a series of 'How to make your own Homemade Sauces' which includes the forever favourites of Tomato, Barbeque and so on! Look for our next post on Sunday! Why not click on our 'Follow by email Button' in the sidebar and pop in your email address so our recipes simply pop into your inbox whenever we post. That way you will be sure not to miss out on any of them as they come on line.